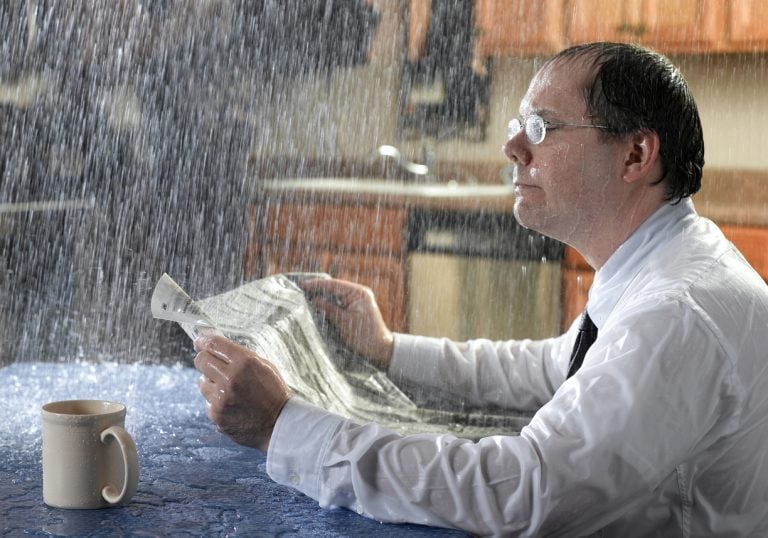
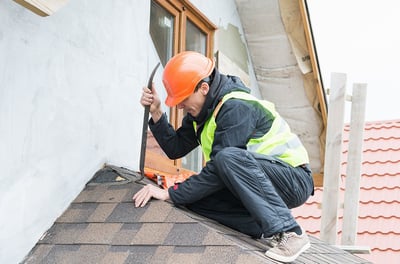
Even the smallest of roof leaks can be stressful. But it's not the actual roof leak that causes the worrying. It’s the damage that the water may cause if it doesn’t get attended to fast.
If you are like most homeowners the first thing that pops into your head when something around the house breaks is, “How much is this going to cost me?”
We get it.
Here’s the thing, we see several marketing companies talking about leak repair costs. Throwing random numbers out here. Numbers that aren’t even close to the real costs in 2024. They probably do it because hardly any roofing companies discuss their prices online. So, we decided we'll tackle this price conversation, right here, with you today.
Here at RoofCrafters, we want to be upfront and address all the questions and concerns you may have about roof leaks. Being transparent with our clients is how we stayed in business for 3 decades. Now we want to share our experience repairing roof leaks with you.
So, in this article, we'll cover the following:
- What causes roof leaks
- What impacts the cost of roof leak repairs
- The 7 most common roof leaks
- What’s required to repair those 7 roof leaks
- How much a roof leak repair should cost
By the end of this article, hopefully, you’ll have a better understanding of roof leaks and what you may need to pay to get your roof leak taken care of.
What Are the Common Causes of Roof Leaks?
Roof leaks, a common nemesis for homeowners, can spring from various sources, each bringing its own set of challenges. As we step into 2024, it's essential to understand that most causes remain timeless. Yet, others evolve with new roofing technologies and environmental changes. The primary issues we encounter are:
- Improper Installation
- Age of the Roof
- Debris Accumulation
- Storm Damage
The Impact of Improper Installation on Roof Leaks
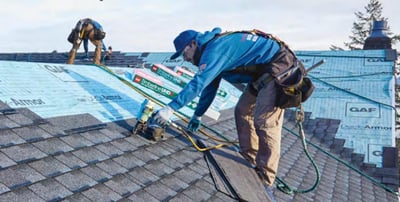
One of the most significant yet preventable causes of roof leaks is improper installation. This can be a range of issues, from shoddy workmanship to using subpar materials. Let's don't forget, "cutting corners" during the roof install. In the realm of roof leaks, the devil is often in the details.
- Shingle Misalignment: The slightest misalignment in shingle placement can create gaps or weak spots where water can seep in. This is especially critical in areas prone to high winds or driving rain.
- Inadequate Sealing: Sealants and flashing are vital for waterproofing around roof penetrations. Like vents, chimneys, and skylights. Improper sealing or using low-quality materials can lead to vulnerabilities.
- Incorrect Flashing Installation: Flashing is designed to direct water away from critical areas of the roof. If installed incorrectly, it can lead to water pooling and cause leaking into the home.
- Ventilation Issues: Proper roof ventilation helps regulate temperature and moisture levels in the attic. Poor ventilation can lead to damp conditions that compromise the roof's integrity over time.
- Ignoring Manufacturer’s Guidelines: Each roofing material comes with specific installation guidelines. Ignoring these can void warranties and lead to premature failures.
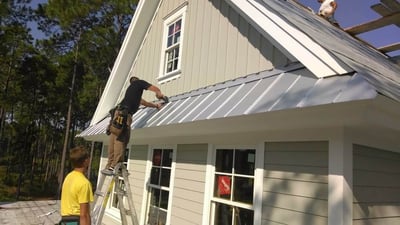
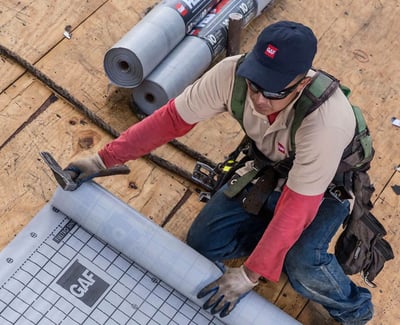
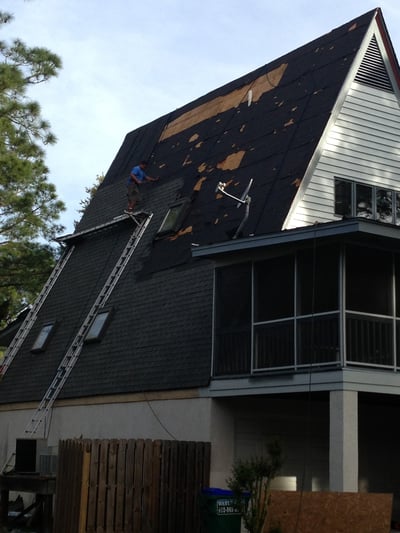
A roof's installation is a critical factor that influences its longevity and effectiveness. It’s important to entrust this task to qualified professionals. They will adhere to the highest standards of workmanship and use the right materials for the job. Regular inspections after severe weather events will help catch any installation-related issues.
Your Roof Install Day is the Most Important Day
It starts at the beginning, the day your roof was originally installed. If the roofers who installed the roof didn't install it properly the chances of the roof developing a leak in the future become extremely high. Even if they made the slightest of errors. This is why it is so important to only trust a local reputable roofing company to handle your new roof or replacement project.
Signs of improper roof installation include:
- Poor alignment
- Gaps in the roof
- Stains
- Lack of symmetry
- Missing roofing
- Holes in roof
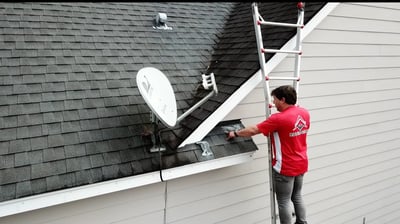
It's also common now to drill holes through roofing to mount satellite dishes, solar panels, or rooftop HVAC units. In any case, these holes allow moisture to seep into the roof and collect below the shingles, causing mold, mildew, and leaks.
How Roof Age Increases Leak Risks
As with many things in life, age plays a pivotal role in the health of your roof. Picture your roof as an athlete. It has its peak performance years. But over time, the relentless exposure to weather elements. The blistering sun, the pounding rain, and the howling winds – start to take their toll. The constant changes in temperature speed up the natural wearing-down process.
As roofs age, their materials begin to break down and lose their resilience. Shingles may crack, curl, or even go missing, and protective granules get worn away. Flashing, which acts as the guardian against water intrusion around joints and valleys, can become loose or corroded. Even the underlayment, a critical barrier against moisture, can deteriorate. Once a roof surpasses its prime. It's not only a gradual decline; it's a race against time, as the deterioration pace often quickens.
This natural aging process increases the likelihood of leaks. A roof that might have shrugged off a severe storm ten years ago could now be vulnerable to even minor weather disturbances. Recognizing the age of your roof is crucial in anticipating potential problems. Regular inspections become more important as your roof ages. Identifying and addressing minor issues before they transform into significant, leak-inducing problems.
Understanding the expected lifespan of your roofing material and keeping track of your roof's age can help you plan. Either maintenance or replacement, this will ensure your home stays dry and secure through the years.
The Role of Regular Maintenance in Preventing Debris-Related Roof Leaks
The enemy of a healthy roof can often be as simple as neglect and debris. Picture this: leaves, branches, and other natural elements, seemingly harmless, begin to gather on your roof. Over time, these uninvited guests can transform from mere nuisances into significant threats! Leading to unwanted roof leaks.
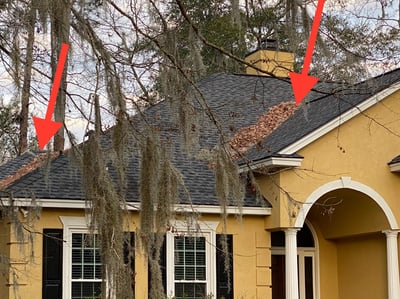
When debris like fallen tree limbs, and leaves accumulate and are left unattended. They can start a chain reaction of deterioration. They trap moisture against the roof's surface. This will foster an environment ripe for rot and decay, particularly in roofing materials like shingles. This moisture haven can lead to the breakdown of even the most durable materials. In severe cases, accumulated debris can even cause physical damage, like dents or cracks, especially after a storm or heavy winds.
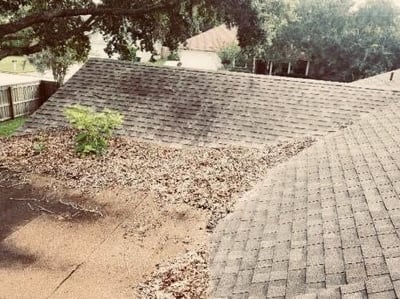
Moreover, this buildup can clog your gutters and downspouts. When rainwater can't flow freely off the roof, it starts to pool, adding undue weight and moisture. The perfect recipe for a leak. This standing water seeps into cracks, crevices, and under shingles, finding its way into your home.
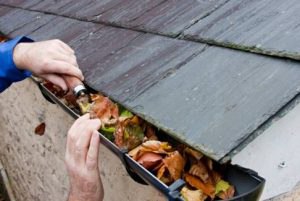
The solution? Regular roof maintenance. Keeping your roof clean and free of debris is a straightforward yet effective strategy in the war against leaks. This includes periodic cleaning of gutters and downspouts and removing any branches or leaves. Routine inspection for signs of wear and tear will help prevent these types of leaks. It's a proactive measure in extending the life of your roof and keeping it leak-free.
How Storm Damage Contributes to Roof Leaks
Storms, in all their fierce glory, are a formidable adversary for any roof. When Mother Nature unleashes her might in the form of howling winds, torrential rains, and hail. Even the sturdiest roofs can face the brunt of her wrath. This assault by the elements is a leading cause of roof leaks and a concern that demands immediate attention.
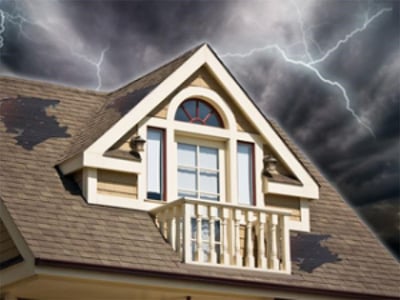
Storm damage is one of the most common causes of roof leaks. Heavy winds, rain, and hail can cause roofing material to decompose and eventually collapse. After a big storm, be sure to check your roof for any damage to prevent a possible leak.

The aftermath of a storm often leaves a trail of subtle yet significant damages that, if ignored, can evolve into serious leak issues. For instance, a few missing shingles might seem inconsequential. But they can lead to water seeping into the roof deck and into your home. Similarly, hail damage might not cause immediate leaks. Yet can diminish the lifespan of your roofing material, making it more susceptible to future leaks.
Decoding the Cost Factors in Roof Leak Repairs
When it comes to fixing a leaky roof, the price tag isn't a one-size-fits-all scenario. The cost of each repair job is influenced by several key factors. These factors create a unique puzzle that is solved based on the specific characteristics of your roof. Understanding these variables is crucial in getting a clear picture of what the repair might cost you.
First off, the type of roof plays a pivotal role. Roofs are usually divided into two types. Low-slope (in commercial buildings) roofs and steep roofs(in residential properties). Each type has its own set of challenges and requirements to repair.
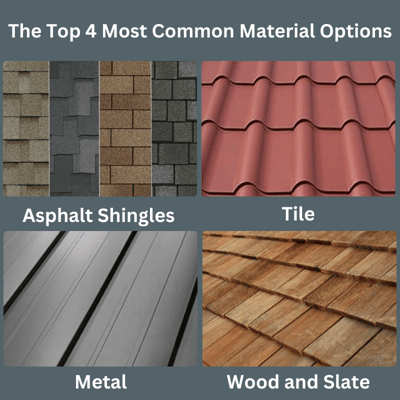
The material your roof is made from is a major cost determinant. Roofing materials vary widely. Each has distinct qualities and price points for installation and repair. Locating a match is an important step for repairs too.
Roofs are made of different materials such as:
- Asphalt shingles
- Metal
- Tile
- Slate
- Wood shakes
- Single-ply membranes
- Modified bitumen
- Built-up roofing
Each material behaves differently under the stress of environmental factors. The expenses incurred fixing a roof leak greatly depend on the material used. The square footage that needs to be repaired and the time or labor required to fix it. All of these factors combined will impact the cost of the repair.
Consider, for example, the differences between repairing a tile roof versus repairing an asphalt shingle roof. Tile roofs might be more durable but repairing them can be way more labor-intensive and costly. This is due to the weight and fragility of the tiles. Asphalt shingles are also more common and generally easier and cheaper to repair. Yet they might not offer the same longevity as some of the more durable materials.
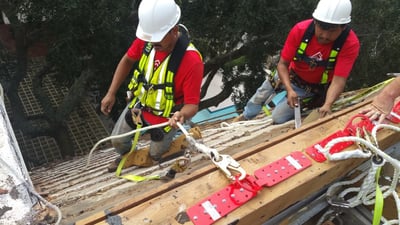
The complexity of the repair job also plays a role. Factors like the steepness of the roof, the accessibility of the damaged area, and the extent of the damage all impact the final cost. A steep roof, for instance, requires more safety equipment and labor time, increasing the cost.

In the next sections, we’ll explore the 7 most common causes of roof leaks. We'll focus on asphalt shingles, and break down the average costs to repair these issues. This way, you’ll have a more comprehensive understanding of what to expect when it's time to mend that leak.
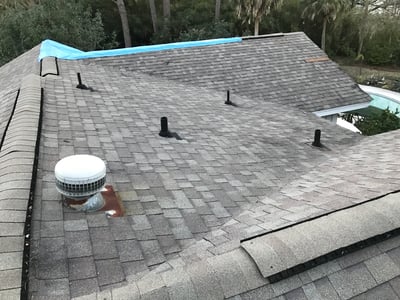
Understanding and Repairing the 7 Most Common Roof Leaks
Roof leaks can spring from a myriad of sources. But there are a few usual suspects that tend to crop up more often than others. Understanding these common causes:
- Pipe boot failure
- Metal pipe collar failure (gas vents & water heaters)
- Leaking valleys
- Chimney leak
- Skylight Failure (seals broken or improperly flashed)
- Roof-to-wall flashing leaking
- Nails pop (nails backing up through the shingle)

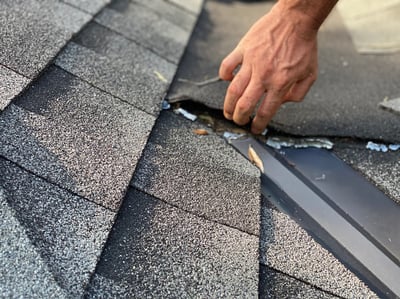
Tackling Leaks in Pipe Boots: A Common Roofing Challenge
Pipe boots are special parts that help seal plumbing pipes that stick out of roofs. They're important for keeping water out. Their primary function is to bridge the gap between the pipe and the roofing material. They prevent water ingress around these vulnerable points.
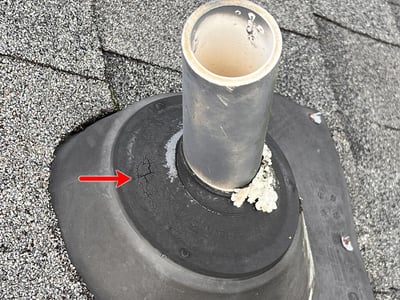
Pipe boots are constructed from either plastic or metal as the base material. They have a neoprene rubber gasket, which snugly fits around the pipe, ensuring a secure and watertight seal. Yet, while effective, these rubber gaskets are not immune to wear and tear. Over time, they can succumb to dry rot and other weathering effects, particularly under constant exposure to the elements. This degradation often leads to leaks. If not fixed, it can harm the roof and inside of the house.
Another popular option in pipe boot construction is the use of lead. Lead pipe boots are favored for their durability and longevity. Lead boots don't use rubber parts like rubber-gasket boots, which can fail from dry rot. Instead, they offer a better solution with less frequent maintenance needs.
It is important to check for signs of wear in rubber boots, like cracks. Also, look for signs of movement or corrosion in metal or lead boots. To protect your roof, it's important to fix broken pipe boots.
Repairing a Pipe Boot Leak: A Step-by-Step Overview
Addressing a pipe boot leak is a crucial repair task to prevent water damage to your roof and home. They're are several ways the job can get done depending on the type of boot.
Here’s how professionals handle this repair:
- Inspection: First, the roofer will inspect the pipe boot for signs of damage, such as cracks, tears, or deterioration. This helps determine whether the boot needs a simple repair or a complete replacement.
- Removal of the Damaged Boot: If the boot is beyond repair, the roofer will remove it. This involves loosening and lifting the surrounding shingles and cutting away the old boot without damaging the pipe or the roof.
- Installation of the New Boot: A new pipe boot is then fitted around the pipe. The roofer ensures that it sits snugly and is secure, preventing any water from seeping through.
- Sealing and Securing: The new boot is sealed with roofing cement or a similar sealant to create a waterproof barrier. The surrounding shingles are then reattached or replaced, and extra sealant may be applied to ensure a tight seal.
- Final Inspection: A thorough inspection is done to ensure the repair is watertight and the area around the pipe is secure.
Estimating the Cost of Pipe Boot Repair: Factors and Pricing
When it comes to repairing a pipe boot on your roof, the costs can vary, typically ranging from $750 to $1,250. This is for an asphalt shingle repair. This price range is affected by several factors. Yet, the roof's accessibility and the complexity of the job are most important.
- Roof Accessibility and Slope: The steeper and more challenging it is to navigate your roof, the higher the labor costs can be. Steep roofs need extra safety measures and equipment, which can add to the expense.
- Type of Repair Service: The nature of the repair itself impacts the cost. A full replacement of the pipe boot, including adjacent shingles, generally leans towards the higher end of the cost spectrum. In contrast, if the repair involves only replacing the rubber gasket or making minor adjustments, the cost might be lower.
- Materials Used: The type of materials required for the repair also plays a role in the cost. Higher-quality materials or specific brand requirements can increase the price.
- Labor: Skilled labor is a critical component of the repair cost. Experienced roofers may charge more, but their expertise can ensure a more durable and effective repair.
Now, let's address mechanical or metal pipe boots.
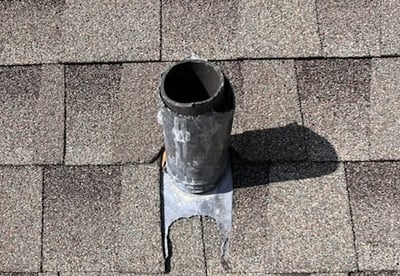
Addressing Metal Pipe Collar Failure: A Key Factor in Roof Leaks
Pipe collars are important parts of your roof. They help vent household equipment like furnaces, water heaters, and dryers. These fixtures, often located in your attic, ensure that exhaust gases and moisture are safely expelled from your home.
A standard metal pipe collar assembly comprises four essential parts:
- Base Flashing: This part seals the area where the pipe penetrates the roof, preventing water from entering. If the flashing is damaged or deteriorates over time, it can become a primary entry point for water.
- Metal Pipe: The pipe itself must remain structurally sound. Corrosion, physical damage, or detachment can compromise its integrity, leading to leaks.
- Storm Collar: This component wraps around the pipe above the flashing. This provides an extra layer of protection against water. If it becomes loose or cracks, it can allow water to trickle down the pipe and into your home.
- Rain Cap: Positioned at the top of the pipe, the rain cap prevents water and debris from entering the pipe while allowing gases to vent out. Damage or displacement of this cap can lead to water seeping along the pipe.
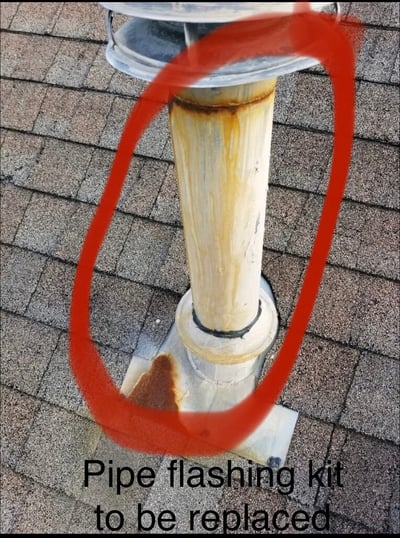
Each of these components is vital for the proper functioning of the venting system. Failure in any one of them can lead to leaks. The failure of metal pipe collars is a common but often overlooked cause of roof leaks. Regular inspections are critical to ensure these components are in good condition.
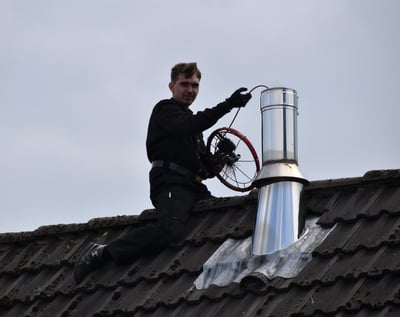
Repairing a Leak in the Metal Pipe Collar: Steps for a Secure Fix
Fixing a leak in the metal pipe collar is meticulous. This component is important for venting harmful gases out of your home. This is not only about fixing a leak but also about ensuring the safety and efficacy of your home’s ventilation system.
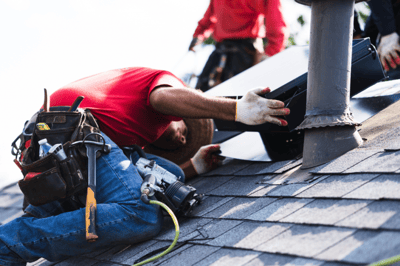
Here’s how professional roofers undertake this repair:
- Assessing Individual Components: The repair starts with a thorough examination of each part of the metal pipe collar assembly. The rain cap, storm collar, and the pipe itself. Depending on the assessment, these parts can be repaired or replaced individually. For instance, a damaged rain cap or a loose storm collar might simply need replacing.
- Dealing with Base Flashing Leaks: If the leak originates from the base flashing, the repair is more comprehensive. This involves removing the existing flashing and the surrounding shingles. It's a delicate process, ensuring no further damage to the roof structure.
- Installing New Base Flashing and Shingles: Once the old materials are removed, new base flashing is installed. This step is critical as the flashing must be aligned and secured to prevent future leaks. Following the flashing installation, new shingles are installed around the pipe collar. Installing them seamlessly with the existing roofing.
- Reassembling the Collar Parts: The metal pipe, storm collar, and rain cap are then replaced or reinstalled. A special sealant is added where it meets the pipe to ensure a watertight seal.
- Safety Check in the Attic: A crucial, often overlooked step is inspecting the attic. The roofer should verify that the pipe is properly connected and functioning. This is not about preventing leaks but about ensuring the safe removal of carbon monoxide and other exhaust gases.
While some homeowners may think about doing it themselves, it's best to hire a professional. This will ensure the safety and efficacy of your home’s ventilation system.
Estimating the Expense: The Cost of Metal Pipe Collar Repair
When it comes to repairing or replacing a metal pipe collar on your roof, the costs can range, with most homeowners spending between $950 and $1,650. This price variance depends on a couple of key factors:
- Roof Steepness: The slope of your roof plays a significant role in determining the cost. Steeper roofs present more challenges for safety and ease of access. They may need extra equipment and time, which can drive up the labor costs.
- Condition of Surrounding Shingles: The state of the shingles around the pipe collar is another critical factor. If these shingles are in good condition, they can be removed and reinstalled, minimizing the cost. But, if they are brittle or deteriorated, they will need to be replaced, adding to the expense.
It’s important to remember that these costs are estimates and can vary. Your location, the complexity of the job, and the pricing of the roofing contractor you choose can impact the cost. A detailed inspection by a professional roofer can provide a more accurate cost assessment.
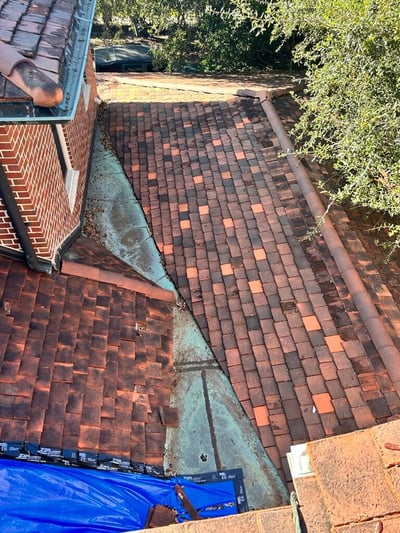
Addressing Leaking Valleys: A Crucial Aspect of Roof Integrity
Valleys on a roof are more than an architectural feature. They play a vital role in the roof's functionality. When two roof sections come together, water flows off the roof at those points. Given their role in directing water, valleys handle a significant volume of runoff.
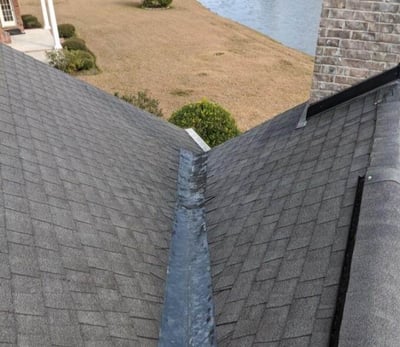
It's also worth noting that valleys are complex areas in roofing construction. The precise joining of different roof sections requires expert craftsmanship. This is to ensure proper water flow and seal against the elements. If there's any compromise, water can get in and damage the roof and structure below.
We recommend maintaining and inspecting roof valleys. This is essential to prevent leaks and prolong the lifespan of your roof. Addressing issues in these areas can save you from costly repairs down the line.
Repairing a Leaking Valley: A Detailed Process
Fixing a leaking valley on a roof is a task that demands precision and care. To fix the valley and avoid future leaks, we follow several important steps. The success of a valley repair hinges on meticulous execution at every step.
Here’s how it's done:
- Removing the Shingles: The first step is to remove the shingles surrounding the valley, both on the left and right sides. This process starts from the top of the roof and continues down to the edge of the gutter or roofline. It’s essential to do this cautiously to avoid damaging other shingles.
- Taking Out the Old Flashing and Underlayment: The next step is to take out any existing metal flashing and underlayment in the valley area. This includes inspecting for and removing any rotten wood decking. This is a common problem in leaking valleys.
- Replacing Damaged Wood: If any of the wood decking is found to be rotten or damaged, it needs to be replaced. This step is critical to ensure the structural integrity of the roof and to provide a solid foundation for the new materials.
- Installing New Underlayment: After replacing the wood, the next step is to install a new ice and water shield underlayment. This material is engineered to provide a waterproof barrier in vulnerable areas like valleys.
- Laying New Shingles: The final step is to install new shingles in the valley. This is done with great attention to detail, ensuring they are aligned and fastened. Special care should be taken when integrating the new shingles with the existing ones to ensure a seamless and watertight finish.
It’s also important to ensure that the new materials used are compatible with the existing roofing system. Given the complexity and importance of this repair, it's often advisable to enlist the services of a pro.
Understanding the Cost of Repairing a Leaking Valley
When facing the challenge of repairing a leaking valley on your roof, the costs can vary but range from $1,550 to $3,200. This variation in price is affected by two key factors:
- Length of the Valley: The extent of the valley that needs repair plays a significant role in determining the cost. Longer valleys need more materials and labor. Which can increase the final price of the repair.
- Steepness of the Roof: The angle and accessibility of your roof also impact the cost. Steeper roofs present greater challenges. The roofers' safety and the ease of carrying out the repair work. They often need extra equipment and precautionary measures. These factors can drive up labor costs.
It's important to remember that these are estimated ranges and the actual cost can differ based on the complexity of the job. The condition of the adjacent roofing and any requirements for extra structural repairs can also affect the final price.
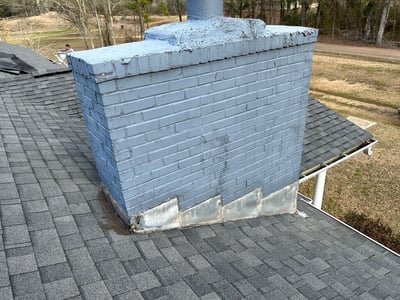
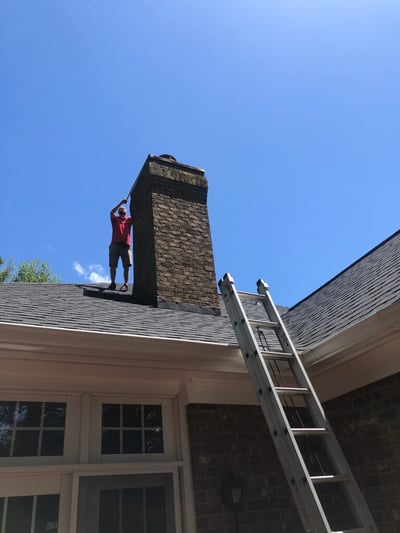
Diagnosing and Addressing Chimney Leaks
Leaks around chimneys are particularly tricky. They can originate from many sources, each requiring a different approach to repair. Understanding the potential causes is essential for effective troubleshooting and repair.
here are some chimney assessment tips:
- Failing Sealant: The sealant around the chimney's flashing is crucial for water tightness. Over time, this sealant can deteriorate, creating gaps through which water can seep.
- Chimney Exterior Material: The condition of the chimney's external material is another source of leaks. This could be due to rotted wood siding, cracks in stucco, or missing mortar in brickwork. Each of these issues allows water to penetrate the chimney structure.
- Flashing Issues: The intersection where the chimney meets the roof is often a vulnerable point. Faulty or aged flashing here is a frequent cause of leaks. Correct installation and maintenance of flashing is key to preventing water ingress in this area.
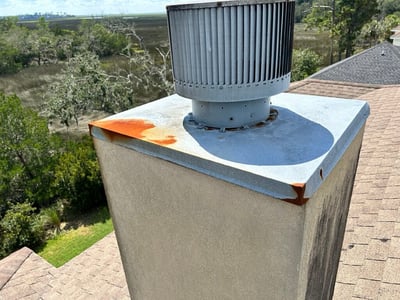
- Chimney Cap: A rusted or damaged chimney cap can also lead to leaks. The cap's purpose is to protect the chimney from rain and external elements, and any compromise in its integrity can allow water to enter.
Given the variety of potential failure points, pinpointing the exact cause of a chimney leak can be challenging. If the source isn't immediately clear, performing a water test can be beneficial. This involves applying water to different parts of the chimney. We start at the base and work upwards, to identify the leak's origin.
Addressing chimney leaks often requires a multifaceted approach. We are dealing with both the roofing elements and the chimney structure itself. Given the complexity and safety concerns, getting a professional assessment is advisable.
Effective Strategies for Repairing Chimney Flashing Leaks
Fixing chimney leaks requires a customized approach, based on what's causing the leak. Here are the common strategies for fixing various issues related to chimney flashing:
- Replacing the Chimney Cap: If the leak is traced back to a faulty chimney cap, replacing it is often the best solution. A new cap will provide effective protection from rain and external elements.
- Resealing the Flashing: Over time, the sealant around the chimney flashing can deteriorate. A professional roofer can reseal this area, ensuring that it's watertight. This often involves applying a high-quality roofing sealant or mastic around the base of the chimney where it meets the flashing.
- Repairing or Replacing Exterior Siding: If the leak is due to issues with the chimney’s exterior materials. Like rotted wood siding or cracked stucco, the affected material may need to be repaired or replaced. This could include tasks like patching up stucco, replacing damaged wood, or repainting and resealing the siding.
- Replacing Shingles and Flashing at the Chimney Base: One of the most common areas for chimney leaks is at the base, where the chimney meets the roof. Repairing this may involve removing the existing shingles and flashing. Repairing any damage to the underlying roof structure, and then installing new flashing and shingles.
There are different repair methods for chimney maintenance and leak prevention. Each method addresses different aspects. The complexity and cost of the repair will depend on the extent of the damage and the specific needs of your chimney and roofing system.
Estimating the Cost of Chimney Leak Repairs
When it comes to repairing chimney leaks, homeowners can expect a range of costs. You're looking at between $2,250 and $4,250. This wide range is reflective of the various factors that can influence the final price of the repair. The complexity of the job is often the most significant cost driver.
Several elements contribute to the complexity and the cost of chimney leak repairs:
- The Extent of Damage: The severity and scope of the damage affect the repair cost. Minor issues like simple sealant replacement will be on the lower end of the cost spectrum. While extensive repairs involving structural work or material replacement will be more expensive.
- Accessibility and Safety Requirements: The ease of access to the chimney and the roof's steepness can impact labor costs. Difficult-to-reach chimneys or steep roofs need extra safety measures. This will increase the cost of the job.
- Materials Used: The type of materials needed for the repair. Whether it’s flashing, sealant, or siding materials, also plays a role in the estimated cost. High-quality or specialized materials come with a higher price tag.
- Labor and Expertise: The skill and experience level of the professionals performing the repair can influence the cost. Experienced contractors doing quality work may charge more, but they also may offer the assurance of a job well done.
To get an accurate cost estimate, it's important to ask a trustworthy professional for a personalized assessment. Taking care of your chimney and addressing small problems can prevent costly repairs later on.
Navigating Skylight Failures: From Natural Light to Leaky Frustrations
Skylights are loved for bringing in natural light and ventilation, but they can leak. Skylights can be both loved and problematic, especially when they start leaking.
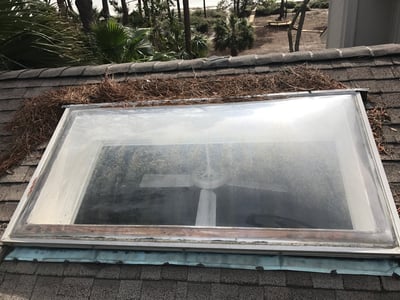
The leading cause of skylight failure is installation issues. When the flashing, the metal strips at the skylight's edges, is improperly installed, it becomes an open invitation for water to seep in. When the shingles and skylight flashing are not integrated, gaps or weak points can form. Water can then take advantage of these gaps.
Besides installation errors, the sealant used in skylights can also fail over time. The seals can degrade due to exposure to the elements, fluctuations in temperature, and natural aging. This deterioration can lead to leaks. These leaks often show up around the skylight's frame or between the glass and the frame, resulting in water infiltration.
Regular inspection and maintenance are key to preventing skylight leaks. Ensuring that the flashing is intact and the sealant is in good condition can go a long way in maintaining the health of your skylight. If a leak does occur, addressing it is critical to prevent further damage.
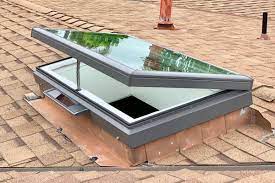
Effective Repair Solutions for Skylight Leaks
Repairing a leaky skylight is a task that requires precision. It also requires an understanding of the underlying issue causing the leak. The approach to repair can vary based on the specific problem at hand.
Here are the typical methods used to address skylight leaks:
- Repairing Flashing and Shingles: Issues with the flashing or shingles around the skylight. The repair involves removing the affected shingles to access the flashing. The flashing is then repaired or replaced as needed. Once the flashing is secured, new shingles are installed around the skylight. This method is often enough when the leak is limited to problems with the flashing or roof integration.
- Replacing the Skylight: In cases where the skylight itself is the source of the leak. A broken seal or cracks in the frame. The most effective solution is to replace the entire skylight. This process involves removing the shingles around the skylight, and then taking out the old skylight. A new skylight is then installed into the existing opening. After the new skylight is in place, new shingles are laid around it to ensure a seamless and watertight finish.
Both methods aim to restore the integrity of the skylight and prevent future leaks. The choice between repair and replacement depends on the age of the skylight. We'd recommend you consult with a professional who has experience with skylights. They can help you to determine the most effective and cost-efficient approach.
Estimating Skylight Repair Costs: Factors and Pricing
When it comes to repairing a skylight, the costs can vary considerably. Falling between $2,125 and $4,300 per skylight. This variation in price is influenced by several key factors:
- Size of the Skylight: Skylights come in various sizes. Naturally, larger skylights will be more expensive to repair or replace. This is due to the increased amount of materials and labor required.
- Features and Specifications: Skylights are available with a range of features that can affect the cost. Options like manual or solar-powered remote control blinds. Skylights that open for ventilation can add to the complexity and expense of the repair or replacement.
- Type of Repair Needed: The nature of the repair work itself influences the cost. Simple repairs, such as resealing a leak or replacing a few shingles around the skylight, will be at the lower end of the cost spectrum. In contrast, replacing the entire skylight can be significantly more expensive.
- Labor and Installation Complexity: The cost will also vary depending on the labor involved. This will vary based on the complexity of the installation and the expertise required. Features like remote-controlled blinds or venting mechanisms can cause the price to increase.

It's important to remember that these figures are approximate. They will vary based on your location, the specific demands of the job, and the current market rates for roofing and skylight repair services.
A skylight job is not one we recommend that someone without experience try to repair. To get an accurate cost estimate, it’s advisable to consult with a roofing contractor. They can assess your specific situation and provide a detailed quote based on the unique requirements of your skylight.
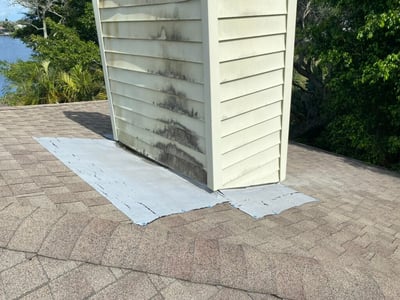
Solving Roof-to-Wall Flashing Leaks: A Critical Junction Point
Leaking roof-to-wall flashing is a common problem in roofing. It usually happens where the roof meets the walls. These areas of transition where different roof levels meet are susceptible to water intrusion.
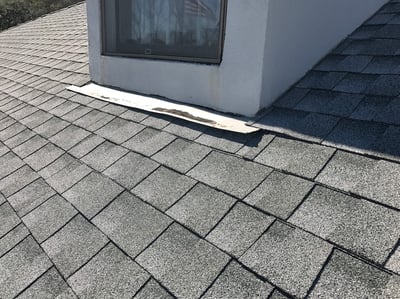
The primary function of roof-to-wall flashing is to create a watertight barrier at these junctions. Flashing directs water away from the wall and back onto the roof. Yet, several factors can lead to the failure of this crucial component:
- Metal Flashing Deterioration: Over time, metal flashing can deteriorate due to rust or corrosion. Once the metal is compromised, it becomes ineffective at repelling water, leading to leaks.
- Installation Errors:. Mistakes made during the installation of either the flashing or the adjacent shingles are common. Which can result in improper sealing and water seepage. Improper overlap, poor sealing, or incorrect alignment of the roofing are installation errors.
- Age and Wear: Like all roofing components, flashing is subject to wear and tear over time. Prolonged exposure to the elements can cause it to crack, warp, or loosen. Which makes it less effective at channeling water away from the roof-wall junction.
Given the complexity of roof-to-wall transitions and the importance of proper flashing installation. Addressing these leaks often requires the expertise of a professional roofing contractor. Inspections and repairs are key to preventing minor flashing issues from developing into major leaks.
Addressing Roof-to-Wall Flashing Leaks: The Repair Process
Repairing roof-to-wall flashing is a detailed procedure. Which varies depending on the type of wall material involved. Regardless of the material, the goal remains the same: to restore the integrity of the flashing and ensure a watertight seal.
Here’s how the repair process generally unfolds:
1. Removing Shingles and Flashing: The first step is removing the shingles around the affected area to access the flashing. This is done with precision to avoid damaging unaffected parts of the roof.
2. Dealing with Different Wall Materials:
- Cedar, Hardi-Plank, or Vinyl Siding: If the adjoining wall is cedar, Hardi-Plank, or vinyl siding, this siding must be removed first to access the flashing. This step is crucial as it allows the roofer to assess the extent of the damage and perform a thorough repair.
- Stucco or Brick Walls: For stucco or brick walls, the repair process is different. It often involves using two pieces of flashing. The first piece, the step flashing, is integrated with each course of shingles and lapped up against the wall. The second piece, the counter flashing, is then installed over the step flashing and embedded into the stucco or mortar joint of the brick wall.
3. Installing New Flashing and Shingles: After removing the damaged flashing (and siding if necessary), new flashing is installed. This new flashing must be aligned with the roofing material and the wall. This ensures it channels water away from the roof-wall junction. Once the flashing is secured, new shingles are installed around the repaired area.
4. Reinstalling Siding (if applicable): In cases where siding was removed, it is carefully reinstalled, ensuring it fits snugly against the new flashing.
The complexity of roof-to-wall flashing repairs can vary based on the architecture of the roof and the materials involved. The key to a successful repair lies in ensuring that all components work together. – shingles, flashing, and siding – To protect against water intrusion.
Calculating the Cost of Roof-to-Wall Flashing Repairs
When it comes to repairing roof-to-wall flashing, homeowners can expect costs ranging from $1,750 to $3,800. This pricing can fluctuate based on several key factors:
- Complexity of the Repair: The difficulty involved in accessing and repairing the flashing affects the price. Complex roof designs or hard-to-reach areas can increase the labor required, thus raising the cost.
- Size of the Wall Area: The extent of the wall that needs to be addressed also plays a role. Larger wall areas need more materials and time, leading to higher costs.
- Type of Siding: The kind of siding on your home can impact the repair cost. Different siding materials need varying methods of removal and reinstallation.
- Roof Steepness: The pitch of the roof can influence the cost as well. Steeper roofs pose more challenges and need extra safety measures. This will add to the repair expense.
- Extent of Damage: The severity and scope of the damage can also affect the cost. Minor repairs will be less expensive than more extensive work.
It's important to remember that these figures are estimates and can vary based on your specific situation. For a more accurate cost assessment, it's advisable to consult with a local roofing contractor.
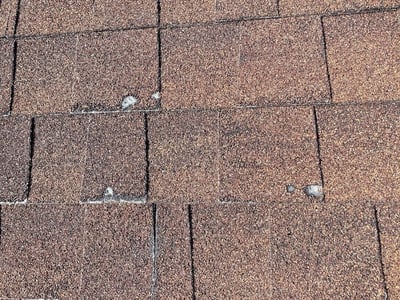
Addressing Nail-Pop Leaks: A Common Roofing Concern
Nail pops occur when our homes have a lot of thermal movement. As the weather goes from hot to cold and back to hot the roofing materials expand and contract. This thermal movement can cause nails to back out.
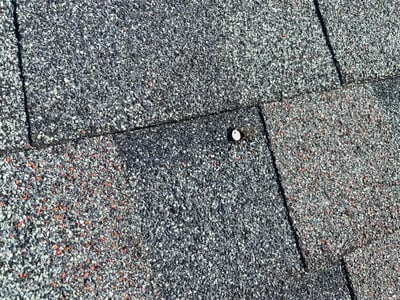
Improperly driven nails can cause nail pops too. Nails that have been under-driven, put in sideways or crooked, can back out causing damage to the shingles. They cause smaller leaks but over time water will find its way in through these nail pops if they are not fixed.
Repairing Nail Pop Leaks: A Straightforward Process
Fixing a nail pop leak is generally a straightforward process. First, the popped nail must be extracted, which involves gently lifting the seal on the shingles to access and pry out the nail. The extent of the damage to the shingle determines the next step. If the shingle has been damaged, it may need to be replaced. But, for minimal damage, a simple repair can be effective. To fix the hole, apply roofing cement under the shingle. It seals and protects against leaks.
Estimating the Cost of Nail Pop Repairs
Repairing a nail pop on your roof is generally one of the more budget-friendly fixes. The costs average around $550. Yet, it's important to note that this cost can escalate if the roof has suffered extensive damage due to many nail pops.
In situations where improper nailing has been a pervasive issue, the cost and scope of the repairs can increase. Sometimes, if the damage is bad, it might be cheaper to replace the whole roof instead of fixing just a few parts.
Can I Afford to Repair My Roof Leak?
Roof leaks are a pain to deal with. They’re untimely, expensive, and can cause interior damage to your home. Roof leaks are all of these things and more, but that doesn’t mean you have to let the cost of their repairs cause you stress. Let’s face it, life is already stressful enough without things going wrong.
Your budget should always be important when it comes to any big home improvement project. Any reputable roofing company will allow you to finance your roof repair if you don’t have the funds available to pay in full right away. The leak must be fixed properly, right away.
Hire an Experienced Roof Repair Contractor
Whatever the reason may be, there is nothing wrong with wanting to fix a problem on your own, we’ve all been there! However, for your safety, as well as the safety of your home, it may be best to call in a professional to come and help you instead. Think of it this way: would you trust someone not trained in your field of interest to take over your job? You wouldn’t, would you? At RoofCrafters, we feel the same way.
Additionally, roof repairs done by professional roofers come with a workmanship warranty. Say the repair doesn’t last as long as stated by the professionals. Any issues that occur within the workmanship warranty period will be addressed for you free of cost. While doing it yourself might seem like a good idea. You could potentially lose your insurance coverage as well as the peace of mind of having a warranty on the repairs.
In the long run, it’s better to leave any roof repairs to experienced professionals. You can save yourself time, money, and possible injuries and instead contact our family at RoofCrafters for all your roof service needs. We are always here to help, whether it's just answering a few questions you may have, or coming out for a repair inspection.
We’ve also put together a hiring checklist to help you better understand the qualities so that you know what to look for in a roof repair contractor. It also has some questions along with the answers so you can better interview your potential repair contractor.
